Walk It Out Dance: How to Do It Step by Step
TL;DR
- The Walk It Out dance is built on alternating steps and side-to-side pivots, not a crossing-step pattern.
- Keep both knees bent, stay low, and pivot on the balls of both feet while the heels remain lifted.
- Practice four steps per bar on 1, 2, 3, 4. You can also dance faster with eight steps on 1 and 2 and 3 and 4 and.
- Learn the feet and weight transfer first. Add Twist-style arm movements after the lower-body pattern feels steady.
- If balance is difficult, hold a stable chair or wall. Stop if you feel pain or discomfort.
The Walk It Out dance is a Dirty South hip-hop move built around rhythm, bent knees, and alternating pivots. When your right foot steps, both feet turn right. When your left foot steps, both feet turn left. Your heels stay off the floor so the feet can rotate on the balls of the feet.
That is different from the crossing-step description that sometimes appears online. In the version taught here, you stay low and pivot from side to side while stepping right, left, right, left.
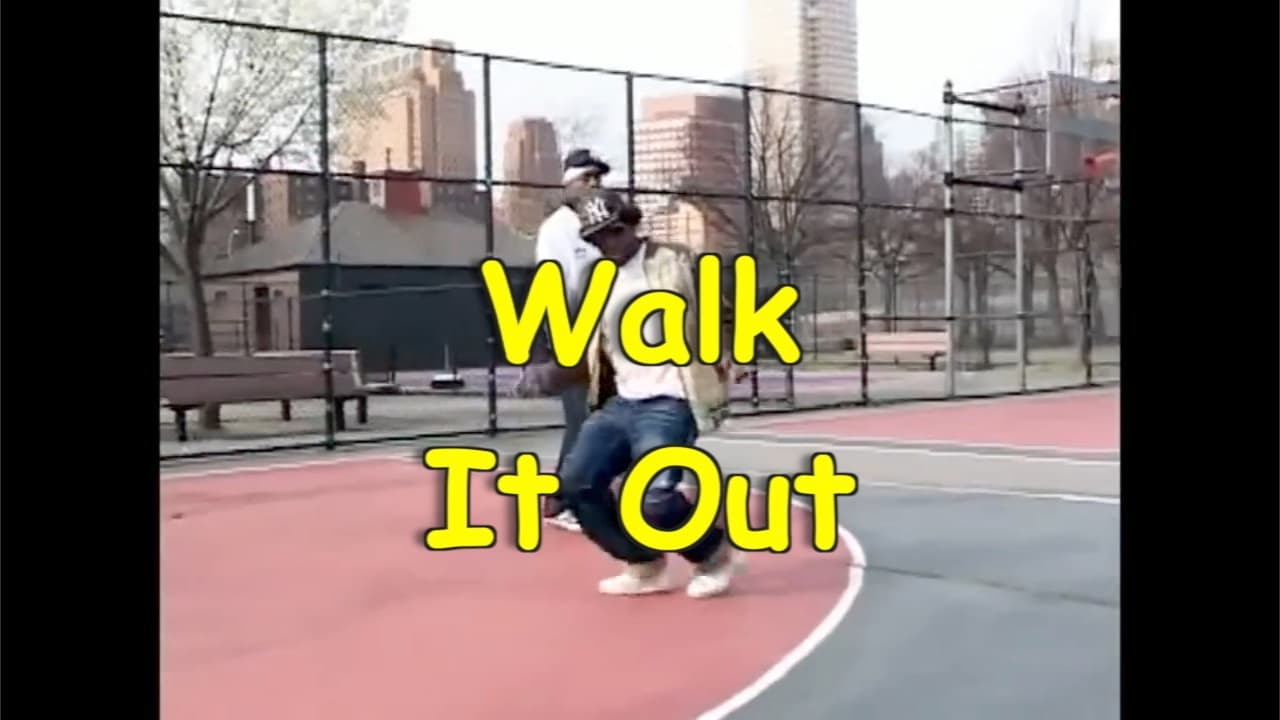
In the demonstration below, hip-hop pioneer Buddha Stretch of Elite Force explains and performs the movement. I trained directly with Buddha Stretch, and I use the same foundation-first approach here: feet and rhythm first, arms later.
What is the Walk It Out dance?
The Walk It Out dance is a hip-hop step in which you alternate your feet while pivoting both feet toward the side of each step.
The movement stays grounded. Your knees remain bent, your body sits low, and the balls of your feet act as the pivot points. The heels turn from side to side without settling heavily onto the floor.
A dance analysis from Duke University also describes Walk It Out through bent knees, the balls of the feet, and arm movements that dancers can personalize. Those details match the mechanics you can see in Buddha Stretch's demonstration.
Where did the Walk It Out dance come from?
The Walk It Out dance came from the Dirty South and became closely associated with Atlanta's dance and rap culture in 2006.
At the beginning of his tutorial, Buddha Stretch calls it one of the newest dances from the Dirty South. He does not claim that he created it. He is giving credit to the region while demonstrating the move.
Atlanta rapper DJ Unk helped carry the dance to a national audience through his song “Walk It Out.” The song's release listing on Apple Music dates the EP to September 5, 2006. An Atlanta history from NPR reports that Big Oomp released the song in 2006 and that it was inspired by the popular Poole Palace dance.
That wording matters. The available evidence connects the song to the Poole Palace dance, but it does not establish one verified creator of the Walk It Out movement. It is more accurate to credit the Atlanta and Dirty South dance community than to assign the dance to one person without documentation.
The same Duke University analysis identifies DJ Unk as an Atlanta-based artist and notes that groups of dancers perform the move in the music video. This supports the connection between the song and the dance without claiming that DJ Unk created the movement.
Watch Buddha Stretch demonstrate the Walk It Out
Buddha Stretch starts by stepping to his right and then alternates right, left, right, left. Watch his feet before watching his arms.
Notice three details:
- His knees stay bent.
- His heels remain lifted as both feet pivot.
- His arms counterbalance the direction of his lower body.
You may start with the left foot instead. If you want to follow the demonstration exactly, begin with the right.
Can complete beginners learn the Walk It Out?
Complete beginners can learn the basic Walk It Out pattern by separating the movement into rhythm, balance, pivots, and arms.
Do not try to learn every detail at once. First practice alternating right and left while keeping your knees bent. Then add the pivot. Once the footwork stays on beat, add the arms.
If balance is the first problem, hold a stable chair or place one hand against a wall. Use the support to practice lifting one foot without leaning your whole body from side to side.
How should you practice before adding the arms?
Practice the feet with the rhythm before adding the arms. The lower body creates the Walk It Out pattern, while the arms add balance and personal style.
With any dance move, the rhythm matters. A dancer can remember the correct order and still look off if the steps do not match the music. Start with four clear steps per bar and alternate right, left, right, left.
If you have trouble identifying or maintaining the beat, use the free rhythm trainer before combining the timing with footwork. BeatFirst shows whether each tap was early, late, on time, or missed. It isolates timing, but it does not replace practice with the actual Walk It Out movement.
How do you do the Walk It Out dance?
To do the Walk It Out dance, keep your knees bent and alternate right and left steps while pivoting both feet toward the stepping side.
1. Bend your knees and stay low
Begin with your feet at a comfortable distance apart. Bend both knees and sit your weight down between your legs.
Do not begin with straight legs and then bounce down only when you step. Keep the bent-knee position throughout the pattern.
2. Lift your heels
Place the pressure toward the balls of your feet and allow both heels to lift slightly.
The balls of the feet are your pivot points. If the heels press firmly into the floor, the feet cannot rotate freely.
3. Step with your right foot and pivot right
Lift the right foot and step down. As the right foot lands, pivot both feet so the toes point toward your right.
Because you are pivoting on the balls of your feet, the heels swivel toward your left as the toes turn right. Think about where your feet point, not what the movement looks like to someone facing you.
4. Step with your left foot and pivot left
Lift the left foot and step down. Pivot both feet so the toes point toward your left.
The heels now swivel toward your right. The left step and left pivot happen as one connected action.
5. Continue right, left, right, left
Repeat the alternating pattern. Every time one foot steps down, both feet point in that direction.
The pattern is:
Right and point right. Left and point left.
The Heel Toe uses related pivot control and can help you understand how the feet rotate without planting the whole foot heavily.
6. Keep your weight centered overall
Try to keep your center between your legs instead of throwing your upper body over every step.
You still need a brief weight transfer. To lift the left foot, enough weight must move onto the right foot. To lift the right foot, enough weight must move onto the left foot. It works like walking: the body stays generally centered, but the supporting leg temporarily carries the weight.
7. Add Twist-style arms
After the legs feel reliable, let the arms move as if you were doing The Twist. The arms counterbalance the direction of the hips and feet.
This is the starting idea, not a fixed arm routine. Buddha Stretch also crosses an arm across his body and changes the level by moving the arms upward, downward, or out to the side. Once the foundation works, use those directions to create your own variations.
How do you count the Walk It Out with music?
You can perform the Walk It Out with four steps per bar or eight steps per bar, depending on the speed and musical choice.
A bar of 4/4 music contains four main beats. Berklee's rhythm explanation also explains that the same bar contains eight eighth notes when each beat is divided into two.
Four steps per bar
Start with this version:
- Right
- Left
- Right
- Left
You take one step on each main beat.
Eight steps per bar
For the faster version, divide every beat in half:
1 and 2 and 3 and 4 and
Take one alternating step on every number and every “and.” In this counting system, the numbers mark the main beats and each “and” marks the halfway point between them.
The “ands” are not four additional main beats. They are the halfway points between beats 1, 2, 3, and 4.
What is the most important cue for the Walk It Out?
Assuming you are following the rhythm, the most important physical cue is: keep your knees bent and stay low.
The most common mistake I see beginners make is standing straight up. When the knees straighten, the movement loses its grounded look and the feet often become heavier against the floor.
Do not bend and straighten on every step. Choose a comfortable low position and maintain it while the feet pivot underneath you.
Common Walk It Out corrections
| What you notice | Likely issue | What to correct |
|---|---|---|
| The movement looks like crossing steps | You are using the wrong footwork pattern | Alternate right and left while both feet pivot toward each step |
| Your feet feel stuck | Your heels or entire soles are planted | Shift pressure toward the balls of the feet and let the heels lift |
| You rise taller with every step | Your knees are straightening | Maintain one comfortable bent-knee level |
| You fall toward each stepping foot | Your upper body is shifting too far | Keep your center generally between your legs |
| You cannot lift the next foot | Your weight is still on it | Transfer enough weight to the supporting foot first |
| Your feet are correct but the move looks off | Your steps are not matching the beat | Return to four steps on 1, 2, 3, 4 |
| The arms make you lose the footwork | You added styling too early | Remove the arms and rebuild the lower-body pattern |
| The pivot strains your knees | The shoes or floor may be resisting rotation | Stop, check the surface, and reduce the speed and range |
Walk It Out practice drills
Use this progression instead of trying to copy the complete demonstration immediately:
- Hold a stable chair or wall and practice lifting right, then left.
- Keep both knees bent and pivot the feet right, then left.
- Combine each step with its matching pivot.
- Practice four steps per bar on 1, 2, 3, 4.
- Remove the hand support when you can remain balanced.
- Add simple Twist-style arms.
- Try eight steps per bar only when the four-step timing is reliable.
- Add your own arm directions last.
Short, focused repetitions are more useful than repeating the full move while the same mistake continues.
Shoes, floors, and pivot control
Wear shoes that allow the balls of your feet to turn without sticking. Shoes with heavy traction can make the pivot harder because the sole grips while your body tries to rotate.
Older sneakers with smoother soles often work well, as long as the shoes are still secure and not damaged. Avoid sandals, loose shoes, or any footwear that may slide off.
At home, socks on a clean hardwood or linoleum floor can make the pivot easier. Socks can also increase the chance of slipping, so clear the practice area, move with control, and hold a stable chair or wall if needed. Do not practice on stairs, rugs that move, or near furniture with sharp edges.
When should you stop practicing?
Stop practicing if you feel pain or discomfort. Do not force the pivot through the knees, ankles, or feet.
The American Academy of Orthopaedic Surgeons advises that exercise should not hurt and recommends contacting a doctor or physical therapist when something feels wrong in its exercise guidance. If you have an injury, medical condition, disability, or physical limitation, consult an appropriate healthcare professional before attempting the movement.
What should you practice next?
Build your Walk It Out in this order:
- Find and maintain the beat.
- Stay low with both knees bent.
- Alternate right and left steps.
- Pivot both feet toward each step.
- Keep your center controlled while transferring enough weight to lift each foot.
- Add simple arms.
- Add faster subdivisions and personal variations last.
For another rhythm-based hip-hop foundation, practice the Running Man. If you need help identifying whether rhythm, balance, weight transfer, or coordination is stopping the movement, private dance lessons provide individualized corrections and custom drills.
More Hip-Hop articles
Train 1-on-1 with Ceech.
Get personalized coaching tailored to your style and goals.
Book a Free Consult